

Map 01: City
The first variation of the map is a city ruins which the fight is close and personal. There are a lot of covers in each zone which is very important for the player to survive since the encounters will be in tight spaces. If any units that are not in cover will be easily gunned down by the enemy. What makes this map unique is the tight spaces and multiple paths and ways to defeat the enemy. The player can either choose the safer way by shooting behind cover and slowly advancing to the point, or the player can use the multiple paths in the encounters to try and flank the enemies.
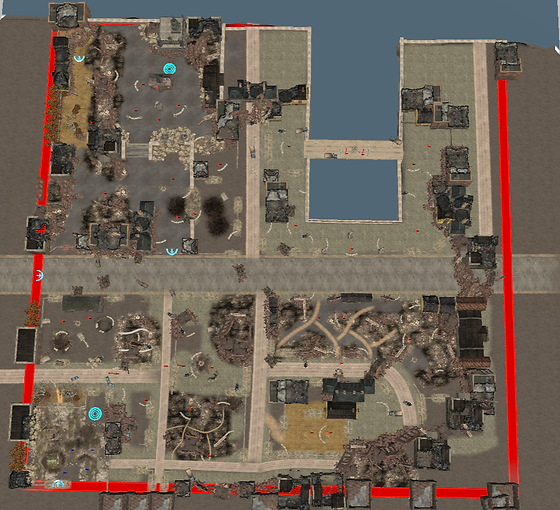
Phases 1: City Ruins

Highlight:
● The Ruins is where the encounter becomes challenging. There are 2 Panzer Grenadiers and a Sniper in a very fortified position. The player can slowly advancing between covers or there is a long flanking path at the bottom where it is only guarded with a Heavy Machine Gunner. By going that route, the player can pick up the Heavy Machine Gun and flank the enemies from behind.
● The River is also a challenging encounter where two Mortar is on the bridge attacking the player. The player cannot stay in the same place for too long or they will be killed by Mortar.
Phase 2: Fortress

Highlight:
● The fortress is guarded by a StuG III tank at the entrance. However, there is a pak40 at the top of the map where the player can use the two flanking route on the side to storm the pk40 and use it against the tank for an easy kill.
Map 02: River

Different from the first variation, the second variation of the map is in an open field. Players now have more empty spaces to move around. The enemies are not as deadly since they are further away from the player. However, there is more space between each cover. Players will have to think twice before moving to a new position which makes enemies such as Heavy Machine Gunner very deadly.
Phases 1: Suburb

Highlight:
● The enemies are fortified inside the trench. The player can flank the enemy from behind by going around the church. Or the houses at the right close to the river are also a good fortification for squads.
● There is a Heavy Machine Gunner at the farm. However, there are opening on both sides of the farm which makes them vulnerable from flanking.
● Vineyard is an uphill battle where a Heavy machine gunner is on the top of the hill. However, there are enough covers for the player to draw it’s fire and flank them.
Phase 2: Fortress

Highlight:
● The enemies are highly fortified at the territory point. There are many Heavy Machine Gunner on top of the stairs. However, there are a lot of entrances to which the player can use at their advantage as Heavy Machine Gunners takes time to change direction.
Map 03: Hills

Different from the first two maps, it is a mix of small tight spaces and big open field which makes small islands surrounding the fortress. What makes this map unique is the two different uphill battles for the player to choose from. The final objective is above a hill which the player can see at all times. The bridge connecting the fortress and the hill makes it an interesting choke point and with a StuG III Tank at the other end of the bridge makes it challenging.
Phase 1: River

Highlight:
● The three territory points can be captured at anytime in any order.
● The trench has an open field on the left and a safer route with more covers on the right. Most of the enemies are on the right hand side of the trench. It is up to the player how they want to proceed.
Phase 2: Mountain

Highlight:
● There are two ways the player can fight their way up to the mountaintop. The left and the right hill both have a Mortar which the player will have to fight their way up while moving constantly.
● The town at the top of the mountain is highly fortified with Heavy Machine Gunners. However, the player can use the newly acquired mortar to help kill them.
● The town also has many entrances which the player can use in their advantage to flank the enemies.
● There is also a pak40 which can be very useful against the StuG III Tank later.
● The bridge connecting the fortress is a choke point which the player will have to fight their way through.